|
|
|
|||||||
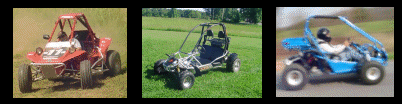
| Mini Buggy General Discussion General Discussion forum for Mini Buggies. (American Sportworks, HammerHead, Carter, etc) |

 |
|
|
Thread Tools |
|
#1
 08-26-2015, 05:56 AM
|
|||
|
|||
|
Hey there, anybody familar with these YD scout's? I picked one up cheap because the PO couldn't keep the chain on. Was off when I got it. Has a tension arm with rollers to keep chain on that was all bent up and rollers shot. I straightened out the arm and ordered new rollers and chain and shimmed the sprocket over a little with some washers and got it going.
My question is seems to take a lot of "pedal" to get it rolling but then it goes fine. I put a new belt and rollers in. The tension rollers push the chain on the top and bottom maybe causing a little more friction than if the chain was just going straight from sprocket to sprocket. I am not familar with this setup but don't see any other way it could be mounted. Maybe the nature of the beast with only a 150cc motor and a heavy cart? 
|
|
#3
08-26-2015, 06:32 AM
|
|||
|
|||
|
It's on the top and bottom. The tension arm is kind of like a "boommerang" shape with the middle screwed on a stud and the two end arms with the rollers ( like skateboard wheels ) on the top AND bottom of the chain. There is only a slight adjustment and just this design seems like it would rob some power.
|
|
#4
08-26-2015, 06:40 AM
|
|||
|
|||
|
I wouldn't be too concerned about it stealing power. I would be more concerned about it flexing the top part of the tensioner, to the point it derails the chain.
My first thought, make a tensioner that only puts pressure on the bottom of the chain. Keep in mind, I'm just looking at your pictures, so my opinion is just that..lol
|
|
#6
08-27-2015, 05:42 AM
|
|||
|
|||
|
They seem to be. I put 10 gram rollers in there after reading that would help with low end power? and put a little bit of graphite powder. I think it had 13 gram and they had flat spots. Clutch seemed fine but lightly sanded pads and clutch face. And put on a new belt.
I am not familiar with this setup but have educated myself reading on this site. Another reason the PO couldn't keep the chain on I figured out later was this wrong size master link ( legs too long ) which gave to much play, and would pop off and screw up the tensioner when the chain wrapped around it. Maybe it's just a heavy cart with an underpowered motor and takes a little bit to get it going.
|
|
#7
08-27-2015, 07:57 AM
|
||||
|
||||
|
Put the rear on blocks and run the engine with the CVT cover off. At idle, the belt should be at bottom of forward pulley and top of rear one. As RPM is increased, the belt should smoothly transition to the top of the front pulley and bottom of the rear. This is important so the transmission starts out in higher ratios and eases into lower ones as it gets moving.
|
|
#9
08-27-2015, 08:36 AM
|
|||
|
|||
|
Just be careful.
 . Someone might dis agree with me on this. But if I know I have work to do inside the case. I don't worry about the gasket. Until you get running the way you want, and ready to go play with it, I wouldn't worry about it. Then when ready, order a new one. Don't think it will hurt anything without it, for a short time. Or I've use a thin layer of gasket seal to seal it for about a month. New I was getting back into it. So wasn't going to waste the only gasket I had left. The edges on the case and case cover. the gasket seal will fill in those holes all around the lips. When cleaning it up, made sure I left the seal in the holes. to get a better seal when put gasket back on. . Someone might dis agree with me on this. But if I know I have work to do inside the case. I don't worry about the gasket. Until you get running the way you want, and ready to go play with it, I wouldn't worry about it. Then when ready, order a new one. Don't think it will hurt anything without it, for a short time. Or I've use a thin layer of gasket seal to seal it for about a month. New I was getting back into it. So wasn't going to waste the only gasket I had left. The edges on the case and case cover. the gasket seal will fill in those holes all around the lips. When cleaning it up, made sure I left the seal in the holes. to get a better seal when put gasket back on.
|
|
#11
08-27-2015, 09:42 AM
|
|||
|
|||
|
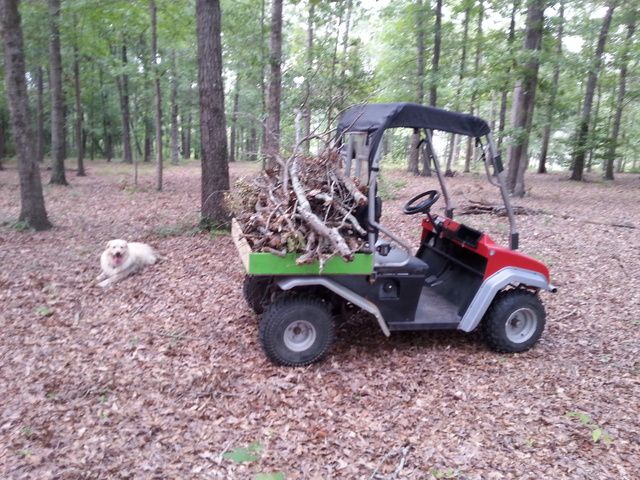
That is a great idea and I have been going into, under and everywhere else getting it right. I even took off that heavy, rattly bed and made this bed out of wood that is light weight and attached with big zip ties.Then when I needed to get to the motor I just cut the ties off. Also I doubt I'll be "bogging" in this cart so as long as water does not get into case I'm probably fine for a while.
|
|
|
|