|
|
|
|||||||
| 150cc GY6 and Under Engine Tech GY6 and Smaller Technical Discussion Forum |

 |
|
|
Thread Tools |
|
#1
 02-06-2010, 10:35 AM
|
||||
|
||||
|
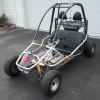
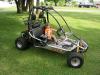
Hello everyone, I'm new as you can see, and just to warn you don't know much about the mechanics of my kart but I've been karting for about 3 years now. I have the Manco 6150 Helix which we have purchased from TS those 3 years ago and I have to say I love every bit of it
 My issue/question: Lately I've been able to ride for only about 10 minutes before the clutch begins to drastically slip, at which point I've been trying to feather the throttle a bit to drive for maybe 5 more minutes until I have to bring it in to "cool down." As far as I can tell, it's definitely something wrong with the clutch system, but the question is what part could possibly need replacement? The whole clutch or is there a part in the clutch that would need ordering for replacement? Second question: I've installed a small headlight kit from Walmart and wired the system up to the key ignition. Ive noticed after about 20 minutes the battery gets really weak if I leave the headlights on, and I've stopped and let it idle with the lights on about half a mile from my house and it has completely stalled. Not fun pushing it back, but I've learned my lesson  Is this an alternator problem, or is the 6150 just not designed for the extra load of lights? Is this an alternator problem, or is the 6150 just not designed for the extra load of lights?

|
|
#3
02-06-2010, 01:55 PM
|
||||
|
||||
|
Quote:
|
|
#4
02-06-2010, 02:50 PM
|
||||
|
||||
|
For the clutch, the bottom line is that you are going to have to pull that side cover off and take a look inside. My guess, from your description, is that the belt is worn out which is not that big a deal if you have got 3 good years out of it. The parts are not too expensive.
For the headlights, the factory battery is a BS-9. The BS-12 is the next size up and will give you what you need to be able to run your lights. It may be time for a new battery anyways.
|
|
#6
02-06-2010, 02:53 PM
|
||||
|
||||
|
Actually, the cover will work too. They put two different holding strap latches to accomodate different size batteries.
|
|
#7
02-06-2010, 10:49 PM
|
||||
|
||||
|
Thanks for the replies! Ah okay, didn't even think about a belt being the problem. As for the battery, I've noticed the different latches and always have wondered about that. Will look into this soon. By any chance would this belt be in the torque converter area on the left side of the engine? Yea I'm not that much of a mechanic, only thing I've replaced on it was the starter motor which was a challenge to take apart.
Oh, and for the battery, would the BS12 need charged say every month or so considering extensive use of headlights (we have them on a switch yet we do a considerable amount of night/blizzard driving)? Last edited by supertoast92; 02-06-2010 at 10:56 PM.
|
|
#8
02-06-2010, 10:56 PM
|
||||
|
||||
|
If you can do the starter, you can pull the cover for the torque converter / belt. If it's slipping, it is most likely going to be either the belt or that rear clutch. You won't really know for sure until you get that cover off.
I sugges that you pull the exhaust off as a unit. Don't try to take those springs off. Not worth the hassel. The exhaust has just two 10mm head nuts holding it on at the head. Those springs will test your patience. Just pull it off as a whole.
|
|
#9
02-09-2010, 05:11 PM
|
||||
|
||||
|
Ok, thanks for the replies! I'm planning on tearing it down and taking a look this weekend around the torque converter. After having to replace the seat belt (seat belt retracting spring broke), replace the tires due to loss of tread, and a failed starter motor, I've learned one thing - these toys are high maintenance.
One quick question about the battery: If I switch to the 12 size, will charging it monthly or so be required? We have to do so with the 9 if we run lights (plus we don't run the kart as much as we used to, so it doesn't get a constant charge).
|
|
#10
02-09-2010, 05:51 PM
|
||||
|
||||
|
Yours may just be an exception. Don't get too frustrated. We haven't had to do anything to ours but give it gas and run the crap out of it. Doesn't mean it won't break tomorrow though. You shouldn't have to charge it once you have the new battery in it.
If you have questions when you go to take that cover off, feel free to ask. Somewhere on here I have a vid of changing the variator weights out which shows you how to pull that cover off. I'll see if I can find it.
|
|
#11
02-10-2010, 02:00 AM
|
||||
|
||||
|
As far as the lights what wattage are they? I have some small lights also from WalMart and they are 50 watts each. If you have a 4pole ao 6 pole stater it is not enough to run 100watts of lighting. You will eventually burn out the stater. Not sure what pole stater the Helix comes with. TOM
|
|
#12
02-10-2010, 03:07 PM
|
||||
|
||||
|
I believe the lights may be 50 or 55 watts each, so they are definitely pulling a large amount of charge. I'm not much of an electrician either, so would it make a difference if I wired the lights up to the alternator? Is that even possible/practical?
|
|
#13
02-10-2010, 04:50 PM
|
||||
|
||||
|
If you connect the lights off the stator and you only have a 4 or 6 pole stator you will in short time burn out the stator, if connected to the battery you will be drawing off the battery and if stator is too small it will not have the capacity to keep up with charging. This is probably why the battery drains down. To run those lights you will need a 10 pole stator. Most stock lights that come on these buggies using the small stators combined are 35 watts, some buggies come with the 8 pole and these lights are usually 35 watt each. TOM
|
|
#14
02-13-2010, 09:39 AM
|
||||
|
||||
|
Alright Saturday, time to take this thing apart! I took it out for one last spin yesterday, only lasted for about 2 minutes until driving was impractical. Good thing I'm taking a look today.
As for the lights, does the Carbide have nearly the same setup for the engine, with the 4-6 pole stator? If so then maybe I should just order the American PowerSports lights which are 35 watts each if I'm not mistaken. I do know the Carbide has a GY6 engine.
|
|
#15
02-13-2010, 10:44 AM
|
||||
|
||||
|
Locate the wires comming from the stator check the color and number of wires. Next look at the plug going to the regulator. If the regulator has a double pigtail with one pigtail containing 3 yellow wires you deffinately have either a 8 or 10 pole. From the stator you will have 2 independant wires and a plug. The independant wires one is the trigger wire going to the pickup the other goes to the cdi box. The plug will have a white, yellow, and green wire. I have seen some of the older blades with 2 yellow wires which were 10 pole. Some of the later models use the 8 pole but with the small regulator with only one pigtail. So unless your regulator has the two pigtails of which one containing 3 yellow wires it will be hard to tell what you have without pulling the flywheel. One other exception is if you have an load bank you could load the charging system to see how many amps it will produce at full load. You will need a gy6 flywheel puller to pull the flywheel. TOM
|
|
#18
02-13-2010, 02:08 PM
|
||||
|
||||
|
ok guys, we've taken the CVT cover off and we're looking at the outmost part of the clutch configuration. For the life of me I cannot figure out how to remove the nut from the bolt because it is on so tight. We dont have a specific clutch removal tool, so does anyone have suggestions? We've lifted up the entire go kart trying to jam the starter with a crow bar and then trying to loosen the bolt.
|
|
#20
02-13-2010, 02:19 PM
|
||||
|
||||
|
You will either need a clutch tool or impact wheather it is air, electric, or cordless. I caution you to not use the aid of a pry bar. You'll end up breaking something which can cost you more in down time and money than if you had acquired the proper tools. I have worked on customers buggies who tried this. Pry the wrong place and you crack the case. Be careful. TOM
|
|
#21
02-13-2010, 02:46 PM
|
||||
|
||||
|
Last edited by BuggyMaster; 02-13-2010 at 02:59 PM. Reason: edited by BM
|
|
#22
02-13-2010, 02:51 PM
|
||||
|
||||
|
Ok, looks like I'll have to go hunting for the tool sometime tomorrow. Besides a specific clutch tool is there some other special tool needed to remove the assembly? I've given up for today - will look tomorrow.
|
|
#23
02-13-2010, 03:00 PM
|
||||
|
||||
|
booda I modded your post and linked direct to the vid I did last summer. The first part of it shows how to do it.
Once you get that nut off, it's pretty easy. I don't blast the nut back on, I use a strap wrench to hold the bell when I go to tighten it. Pick one up at sears for pretty cheap. How does everything look thus far? Belt in good shape? Anything look burnt? Post a pic if you can.
|
|
#25
02-13-2010, 06:24 PM
|
||||
|
||||
|
Quote:
|
|
#26
02-14-2010, 04:37 PM
|
||||
|
||||
|
Alrighty, we went to Lowe's today and found a good Kobalt strap wrench. Worked like a charm
Here are some posted pictures of the CVT area. By the measurements we made, the outer clutch cover was about 2mm beyond the service range, and the belt was right at the service range. We're ordering a new belt, outer clutch ASM, two new spark plugs and a CVT gasket (other once I had to scrape away, was cracking apart).
|
|
#27
02-14-2010, 04:41 PM
|
||||
|
||||
|
hmmmm... I have seen much worse clutches that still functioned. How's your variator look? (front pulley). Did you take it apart and look at the rollers?
|
|
#28
02-14-2010, 05:47 PM
|
||||
|
||||
|
the clutch pads didn't look bad Like Bm said. there have been worse that still functioned. use some 80 grit emory cloth and clean/ shine the contact area inside the clutch bell. the bell gets glazed up with pad residue Sanding the contact area will improve the grip.
|
|
#29
02-14-2010, 06:07 PM
|
||||
|
||||
|
That's a good idea, but what we measured was the clutch casing as in the last picture I posted. We took a measurement of the inside diameter, and it measured about 5mm too wide from the service range. However sanding is a great idea, there's a ton of residue in it right now.
|
|
#30
02-15-2010, 10:36 AM
|
||||
|
||||
|
Ok, we've just ordered the parts and they're supposedly going to be here within a week. Thanks for all the support and feedback from my questions and descriptions.
I've been looking through the Helix service manuals trying to find a rating for the torque on the nuts for the two pulleys for when we put it back together. Does anyone know the settings already? Or is there no rating?
|
|
#32
02-15-2010, 11:43 AM
|
||||
|
||||
|
supertoast, how did the variator and rollers look?
|
|
#33
02-19-2010, 05:09 PM
|
||||
|
||||
|
Well, I never took a look at the variator when we put it back together. Good news is it runs great now! All it needed was a new belt - the old one was worn pretty badly. I'll try to get some pics and/or a video of it tomorrow!
We had the muffler re-welded , so that's no longer loose. We also put in a new spark plug and gasket on the CVT cover. Runs excellent now and quiet, not one slip or choke while running. I think I even adjusted the idle now so it doesn't randomly stall or idle too high. Last edited by supertoast92; 02-19-2010 at 05:12 PM.
|
|
#34
02-19-2010, 05:13 PM
|
||||
|
||||
|
Awesome! Doesn't hurt to have spare parts!
|
|
#35
02-19-2010, 05:22 PM
|
||||
|
||||
|
Yup, and now we have two usable clutch plates. Those parts we ordered weren't that expensive either. Now all I need to do is find a light kit or light bulbs to replace the 55 watt lights and I'm all set. Right now we unplugged one of the lights so it's only drawing 55 watts.
|
|
|
|