|
|
|
|||||||
| Mini Buggy General Discussion General Discussion forum for Mini Buggies. (American Sportworks, HammerHead, Carter, etc) |

 |
|
|
Thread Tools |
|
#1
 06-23-2012, 06:58 AM
|
||||
|
||||
|
This is going to be a review, of sorts, on the TM 300XRX. It will include the good and the bad, and when I get this new(used) computer, and its picture software figurred out, I'll post some pics too.
When I orderred this buggy, I was promised 3-5 day delivery...it came in in 6 days....that's liveable. The shipping crate was no more than a heavy cardboard box! Including the base with the forklift "channels" to pick it up...all carboard, and in less that satisfactory appearance when it arrived. This is an area that Trailmaster needs to improve. A wooden pallet and a metal inner frame to support the box, should be the minimum to ship a buggy in. As a result of this unsupported box, there was some chafing and paint damage on the left side. Also a fork lift damaged(dented) one tube of the right rear swing arm. I chose NOT to persue the paint damage, as it was minor, and I'm sure it will get even more, once it hits the trails. The swing arm was reported, though not replaced. Being on record though, if any cracks, or unusual further damage becomes evident, I'm told TM will make it right. 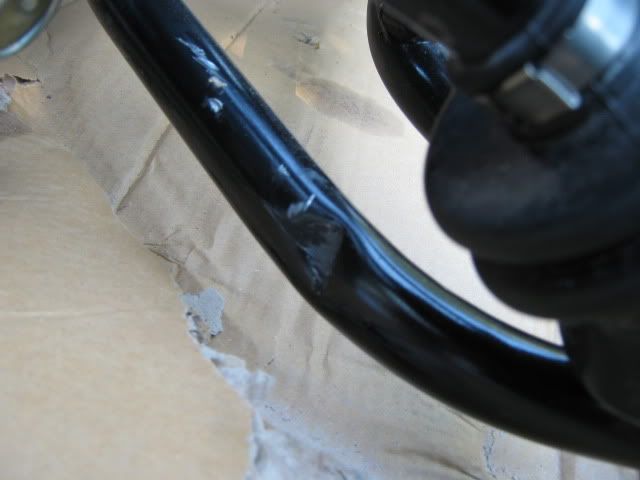 The tp roll bar crossbar assy with mirror, was missing. TM had me a new one in my possession in 4 days, no problem. The tp roll bar crossbar assy with mirror, was missing. TM had me a new one in my possession in 4 days, no problem. There is a lower, mud guard under the frame, that fastens with 4 screws on each side, to keep mud, etc, from being thrown up into the chain, disc brake, etc. It is louverred so it can drain off and not retain any build up. It was installed backwards...the louvers would have acted as scoops to shovel as much as they could, into the areas we don't want them. Take eight screws out, turn it around, and put eight screws in, fixed. No big deal, but it shouldn't have needed fixing. 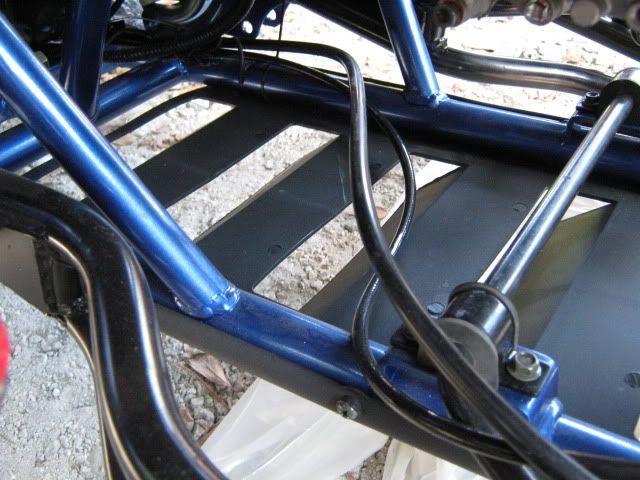 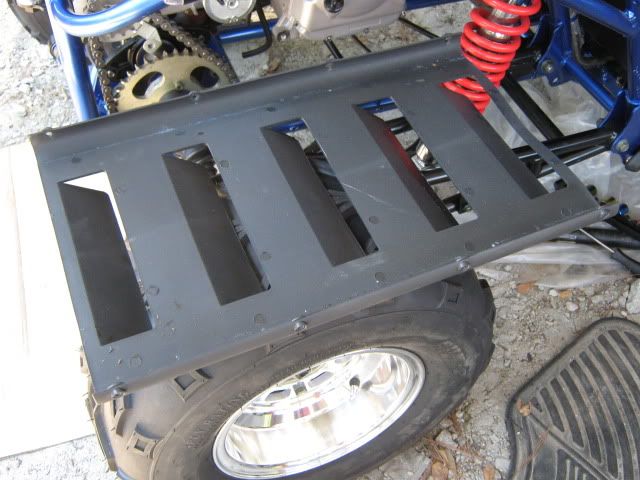 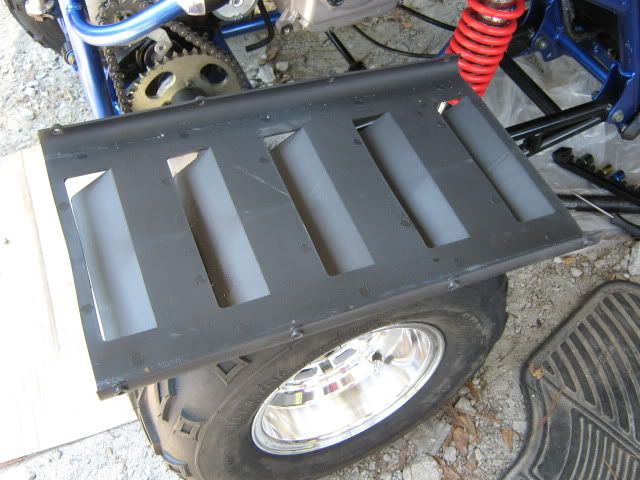 Gear box lube. There are 2 apparent plugs under the gear box, but only ONE is the drain, that is the one closest to the rear. DO NOT remove the other plug. It is part of a spring detent holder for the tranny shifter.. Remember, remove the plug closest to the rear! The gear box is embossed for 750ml capacity. I only drained about 250ml...it was LOW! The is NO level plug that I have found to check the level with either. To check it, you must DRAIN it, and refill. AHHHH, the re-fill plug.... remove the chain guard, remove the radiator guard, remove the chain, remove the chain adjuster AND the C.A. plate that is bolted to the gear case with 3 bolts....now you can get to the fill plug! I did some serious mods here. I trimmed a corner off the C.A. plate for access to the plug....now NONE of this dissassembly will be necessary to refill the gearbox. BUT in doing so, the chain guard will no longer be used either. Refill the gearbox with the apppropriate gear lube, and you're done. Future changes will take less than 5 minutes. 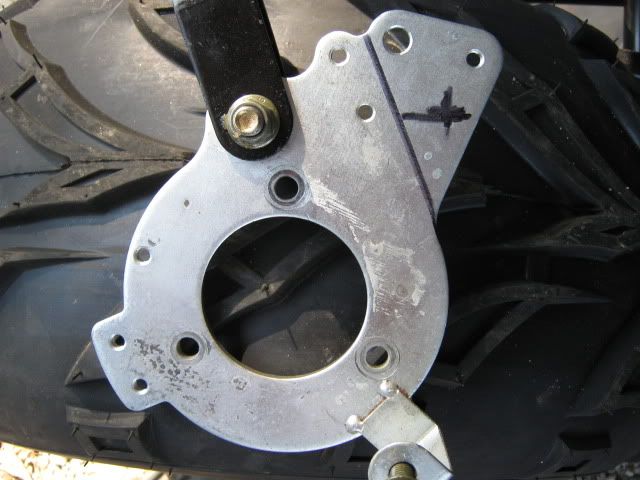 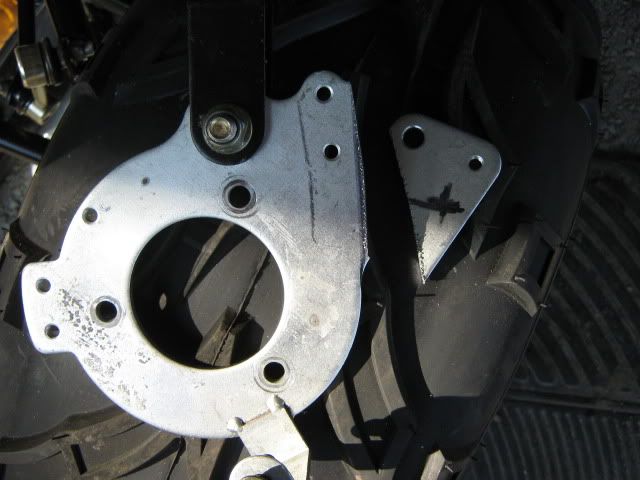 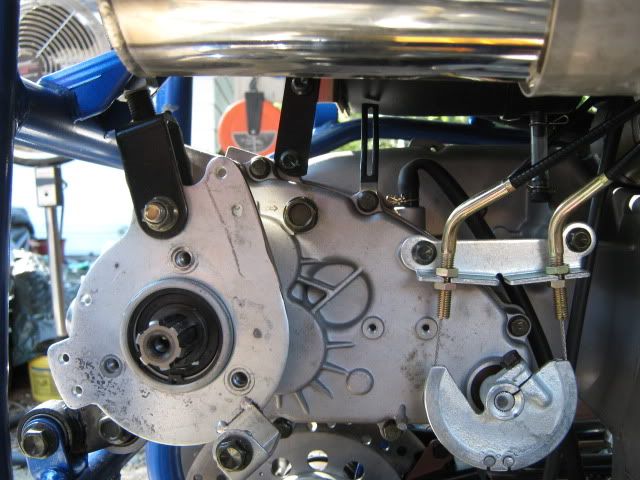 The radiator guard, which had to be removed to access the chain adjuster, I have remade into an entirely different unit, allowing access to the adjuster without removal of the rad guard. the new rad guard is also going to allow freer air flow through the radiator. The radiator over flow bottle, is in a perfect location, elevation wise, to the radiator, but if you want to service it, remove the cap...then you'll need to remove the entire rear luggage rack! So, time to modify again, out came the 4" grinder with a cut-off disc, and 1 tube in the bottom of the luggage rack got a 5" section removed. PERFECT accessability now. 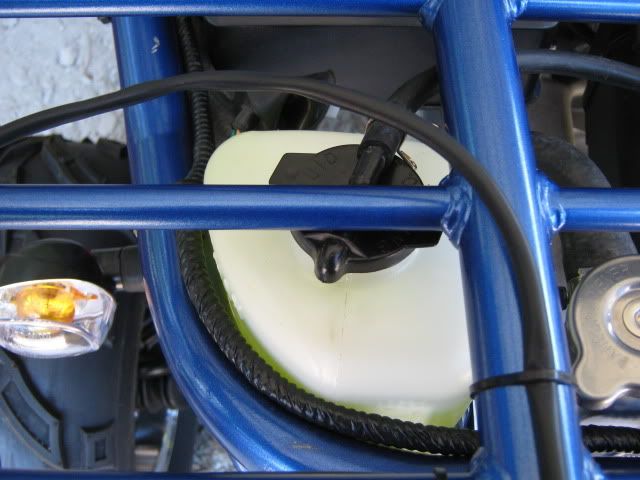 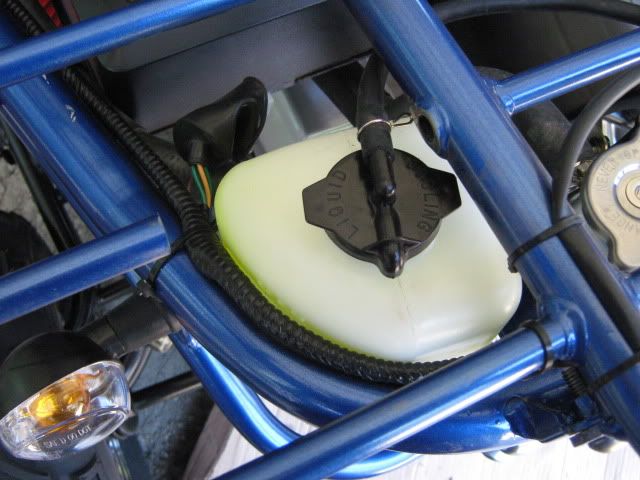 The gas tank....must be mounted to the luggage rack, before the luggage rack is mounted to the frame.... PLEASE chech the fuel petcock orientation BEFORE you bolt the rack down. Otherwise, you may be removing the rack to rotate the petcock 180 degrees, to hook up the fuel lines. The fuel lines...I always replace Chinese fuel lines with American fuel line....the carb has a 1/4" fitting, the petcock a 3/16" fitting. I fabbed up an adaptor from 2 brass barb fittings, a 3/16 and a 1/4". used 3'16" fuel line out of the petcock, through the adaptor, to 1/4" line througha large free flowing filter, to the carb. a screw type, clamp was needed to seal the line on the carb, all the rest are typical motorcycle spring type clamps. Engine oil...the book is inconclusive as to how much oil this engine holds. I one place it says 30 ounces. In another 1 and 1/4 quart. It took 1 and 1/2 quart for me to get a full register with the dipstick crewed in, dead center of the measuring area without screwing it in...so 1.5 quarts seems to work for me. BE SURE to drain the oil and clean the strainer BEFORE starting the engine. They have been run in Cina with the shipping oil in them, and the strainer in mine was 80% clogged with silicone gasket sealer...80%! I will put about 2-4 miles, yup only 2-4 miles on it today, and change it again! I want as much of that crud out of there as possible, as soon as possible. I can afford a few extra quarts of oil, to insure good engine life, can't you. 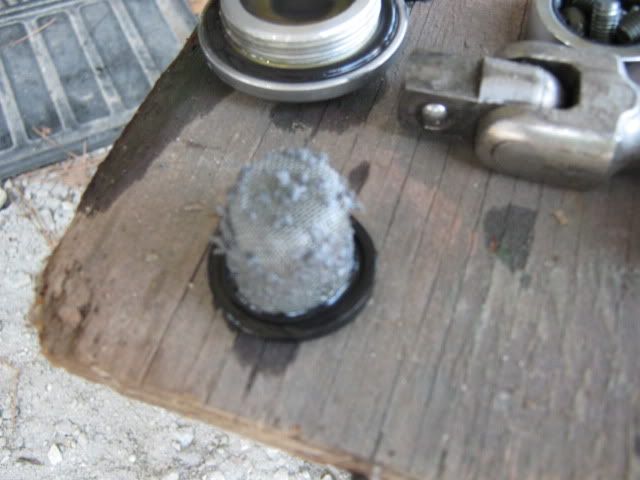  So far that's about it. Nothing really surprising, and after you've worked on some of this Chinese stuff(been doing scooters for a while) you come to expect the oil strainers to be nasty, gear boxes to be low, and parts to be on backwards.... It doesn't bother me any more, I just atke the bull by the horns, fix what needs fixing, mod what needs modding to make a better vehicle, and continue on/ Does any of this cloud my opinion of the Trailmaster? Not at all. It's a Chinese Buggy I paid half or less what I'd pay for a compareable buggy, IF one like it were American made. And in all likelyhood, it would still have issues, I wouldn't like and would want to correct. This is just a head's up for those getting a TM 300XRX. What to do, how to do, and why I did it. I'll bet if I'd bought a brand new HH250, I would have found just as many problems, and some of them almost identical...oil strainers.... Hope this helps some of y'all out. I'll update as time goes by, and other mods become necessary, or just wanted(LOL) Gear box lube....750ml Engine oil..........1.5qts
__________________
kliff Last edited by kliff; 06-23-2012 at 07:33 AM. 
|
|
#3
06-23-2012, 07:26 AM
|
||||
|
||||
|
Quote:
 It cames, as they say, with some assy req'd. None of the wheels and tires were on it, the entire roll cage was broken down, and had th be assembled on the main fram, the front struts had to bolted down, steering wheel installed, battery had to be filled w/acid, charged and installed, gas tank and rear rack had to be installed, every nut and bolt had to be checked for tightness, some, such as turn signals, etc, would have fallen off in the first mile. 
__________________
kliff
|
|
#4
06-23-2012, 11:54 AM
|
||||
|
||||
|
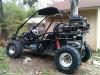
Nice toy!!!Great review & valueable tips- How about a full pic of your new toy? You've proven that even a well engineered product can still use modifications for the end user. As you stated there will probably be more items to attend to after it get's a healthy work-out.
|
|
#7
06-25-2012, 08:25 AM
|
||||
|
||||
|
I'll get a pic or 2 up, of the buggy today guys. I bought it from Steele Powersports. It listed for $3899.00, but due to another dealer still mistakenly having it listed on the web at $3799.00, Travis price matched that, and gave me free freight. I bought quite a few spares, cables, brake pads, CDI, rectifier, and some goodies too, Mr Pulley HIT clutch and variator, and got a discount there as well....
NOW....MORE problems, minor but aggravating, and as far as I can tell, nothing brand specific, just bad luck. The night before heading out to DP, I was gonna load up, and be ready to pull out early. WRONG. No electrical power. Dead battery? sure acted like it, but that wasn't it. When the key was turned on, NOTHING, no lights, no power anywhere. Since it wasn't the battery, it had to be the fuse. Nope, fuse isn't blown, "looks" good.....NOTE, don't trust "LOOKS" with Chinese fuses. Jigged wires, checked connections, and power would come back, intermittantly....this was proving to be a real hair puller. FINALLY, I bummped the fuse holder, and power came on. Thumped it , and it went off. Openned it up, and power came back on. Took the fuse out, and tasted it with an ohm meter...tests good, them bad, then good....one of the end caps then fell off!!!! Replaced the fuse and was good to go. Note to self, AFTER DP, I'll replace the funky fuse holder, and put a "blade type" fuse holder in it's place. Glass fuses were antiques 20 years back! At DP, and she is running GREAT, fact is, put about 14 miles of break in on her, and pulled in by the truck, for a gator aid, and to let 'er cool, before tackling the GP track. Well after about 20 minutes, I feel refreshed, checked the oil, all OK. Jump in, strap in, helmet on....turn key....click. turn key again...click. Lights good, horn good....strter...ain't happenning. I've had this problem before, on chinese scooters, and on my Yerfie.... BAD SOLENOID. It happens. If it's electronic, it can go bad. And these little solenoids and I already have a history. So another up-grade will follow.... a LARGE Ford automotive 4 wire solenoid.... Pics will follow. In this post, later today.
__________________
kliff
|
|
#8
06-25-2012, 09:33 PM
|
||||
|
||||
|
Hey Kliff, nice write-up. Hope you get all the kinks worked out soon and can enjoy that thing.
I noted your issue with the fuse and this is kind of ironic. Papa Rich just had that exact same problem. He showed me the fuse that looked perfect at the Bash, but it wasn't good. I had a similar problem in my camper last year. 12v radio would light up, but when you pushed the power button, nothing. Fuse looked good, but after I messed with it the silver cap pulled right off. Regarding the rear skid plate with the louvers, I believe that is supposed to point forward to draw in air while moving and assist with cooling the motor. Those fins/louvers break off pretty easily and most run without it. After breaking a few off, I riveted on some mud flap material about the same size. Anyway, keep us posted.
__________________
 2007 Hammerhead 250SS 2005 Baja 90
|
|
#9
06-29-2012, 08:40 AM
|
||||
|
||||
|
Hey, thanks guys, glad y'all are enjoying this. I'm sure you've all, been through it at one time or another, but heck, some of the new guys really need to know what they are jumping into. Nothing serious, or overly complicated, just working the bugs out, for optimum reliability.
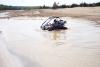
Yeah, Sockman, seems like something as little as a fuse would be the last thing to worry about, but from now on, I'll swap out the glass bodied fuse holders and fuses for an after market blade fuse holder. I've never had any continuity problems with one, unless the fuse was blown....no more loose end caps and variable continuity for me...here's what I installed... 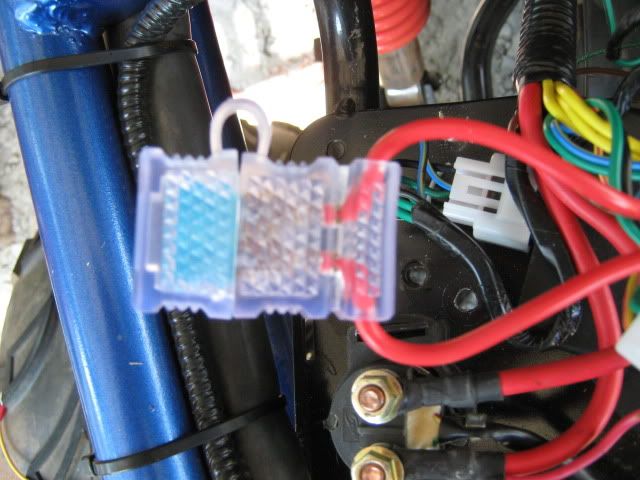 Next, I chnged out the faulty starter solenoid. I was going to use an auto type solenoid, but didn't have enough amperage in the small gae wire to make it happen...then I rememberred, on the Yerf, I increased all the wiring to 12ga...for enough amperage to energize the solenoid. So rather than rebuild the entire wiring harness, I decided to stick with the Chinese solenoids. I had a new GY6 scooter solenoid on hand, but it's plug was different. So I cut it off, installed a pair of female spade terminals, double insulated each with heat shrink, and plugged them in. VOILA! we have starter function again. A SPARE solenoid WILL be in the tool box next time I go out. Doubt I'll ever need one again, but it's small, cheap, and easy to carry, just like fuses...I'll have one on hand.here's a pick of the spade plug set-up... 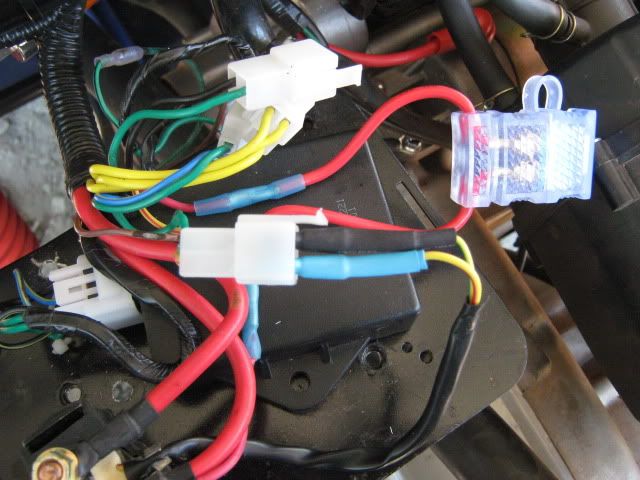 While I was tinkerring, I went ahead and changed the oil again. remember how bad that strainer looked, from just a minimal run time in China? well, I wanted to be sure all the loose yamabond was gone, and wanted to check for any stray metal particles, etc. The Strainer was perfectly clean, albeit for one small piece of yamabond, about the size of a BB. Nothing else, no shards of metal, no casting flash...NOTHING. I have NEVER seen a Chinese GY6 come out this clean, on the first operational oil change. It usually takes 2-4 changes to obtain results like this. It DOES NOT mean I'll quit making repititious oil changes for the first 100-150 miles, but it sure makes me feel better. Here's a pic of the strainer, as it came out... 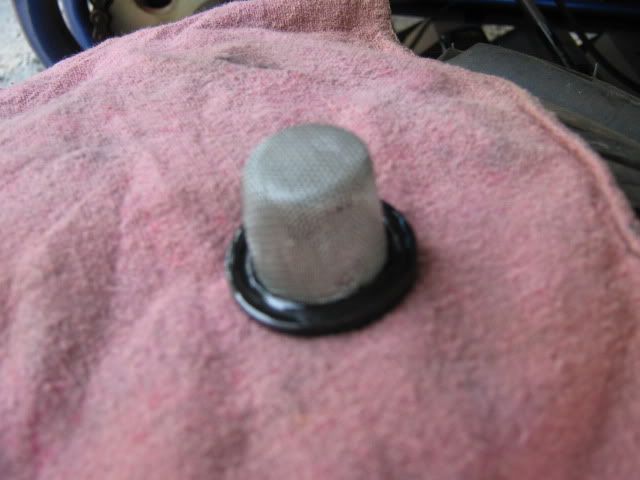 Another mod too. Made this before the DP ride, but didn't get it posted. The radiator guard is a purty little jewel... 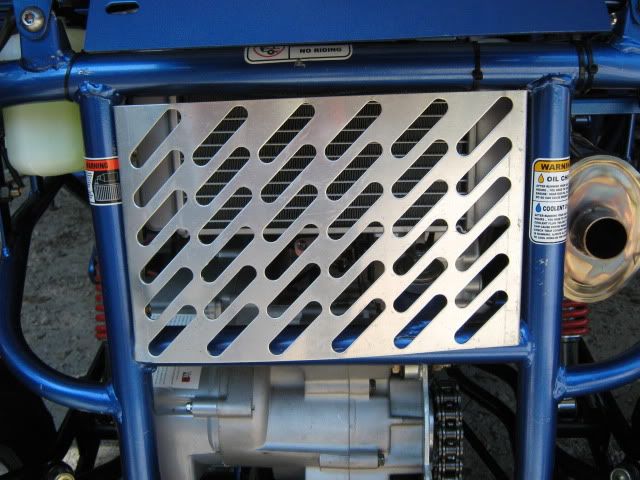 But it is a PIA to take off to adjust the chain. I personally beleive it is too close to the radiator to allow a free flow of air to get through. O maybe I should say, I beleive air flow could be improved if it weren't as close to the radiator. So the goal is a guard for the radiator, that will still protect it, and on that will allow easy access to the chain adjuster without having to remove it, when the chain needs servicing. this is what I came up with... 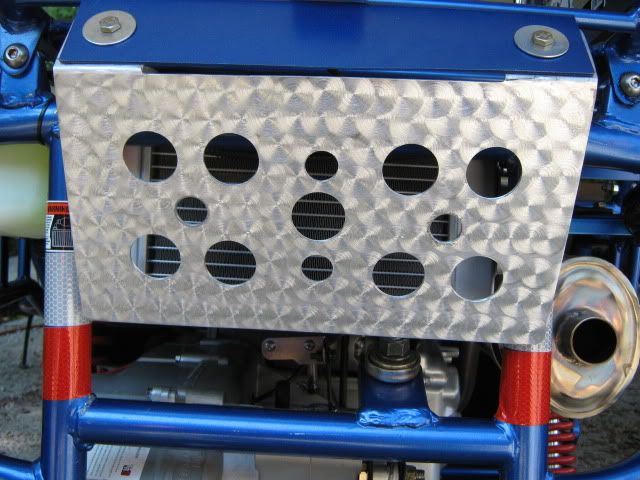 It mounts on the license plate mounts, and angles back to the lower edge of the radiator. At the top, I've gained about 4" more clearance from the radiator. NOW you can actually feel the air being blown through the radiator by the fan, whereas before, I could feel nothing. Does it help, dunno for sure, because I made no scientific tests before or after. But in my mind, and what I was able to feel, just by jumping the fan out, and "feeling" for air flow, I'm convinced I've made a difference. BUT the added benefit, is the CHAIN ADJUSTER! You can see it, touch it, get wrenches on it, and USE it, all without removing anything else. Maintenance has just been made easier. And for those that have been asking, here's a pic of the buggy. SORRY for the uber poor quality...I have no idea what happenned. I'll get some better shots on the next day or so. This pic was just before unloading at DP last Saturday...  That's about it for now... but my "spares" list, which I'll carry on the buggy has grown slightly. I do beleive in carrying a few spares, just to get out of the woods, and the list will be growing, as cash flow, and next moths budget allows. Right now, onboard spares consist of: Throttle cable For/Rev cable Fuses, Solenoid Reg/Rectifier Ignitor(CDI) Spark plug Wire ties, 3"-24" electrical tape heat shrink fuel line fuel line clamps bailing wire Small ratchet straps and the tools required to change any item carried. Still to come are a spare chain & M/link(s) assorted nutz & bolts Tow strap I'd be curious to know what spares some of y'all cary, that are not on my list, and I might want to include. Also, though not a spare, but definitely a useful part of PM(preventative maintenance), every time I go to the gas station, and fill up my gas cans, for the buggy, lawn mower, edger...etc...just everything around the house. I add Sta-Bil to the can, as soon as I get home. No telling, how long that gas may sit in an edger, generator, mower, even just the can, depending on the time of year. And I have had ZERO carb problems, or start up problems, even after MONTHS of sit-up time. I started my generator last week...been sitting with the same gas in it for 6 months, without a start up. 2nd pull and she was purring like a kitten, took a full test load....electric heaters are great for that, and never missed a beat. Shut her down, after an hour long load test, and topped off the gas tank. She'll be ready next time too, even if it is another 6 months. Probably shouldn't advertise for Sta-Bil, but the stuff works for me, and I hate cleaning carb jets, just because the gas got old.
__________________
kliff
|
|
#10
07-27-2012, 08:39 AM
|
||||
|
||||
|
hey man I made it over,lol. another trailmaster owner! Yay. hopefully there will be even more!
|
|
#11
08-26-2012, 08:11 PM
|
|||
|
|||
|
Thanks for the thread. The fuse trick saved me, as mine was bad when we recently purchased our 300 last weekend.
Great review
|
|
|
|